
Instructions for Granting Proxy Access in APR2
Proxy Access
Granting proxy access to another person allows that person to log into Self-Service and view your information related to Financial Aid, Grades and/or Notifications.
Accessing the View/Add Proxy Option
Once you are logged into Self-Service, click on your username, and select View/Add Proxy Access.
Adding a Proxy
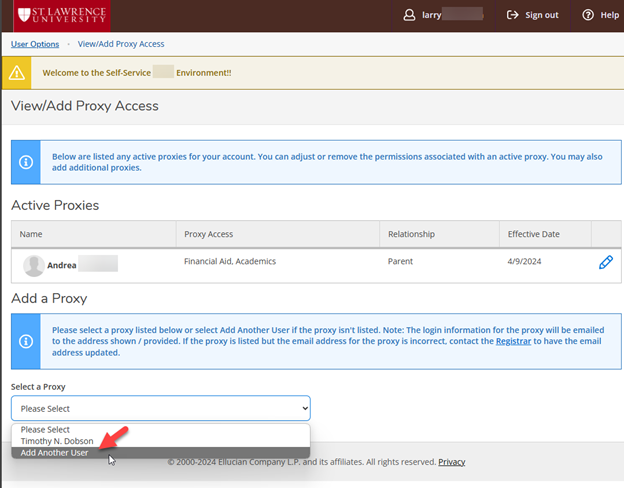
To add a proxy, click on the Select a Proxy dropdown. If you have any relations already in the system, they will be listed. There is also the option to Add Another User. If the proxy you want to add is one of your relations listed, choose the appropriate person. Otherwise, click the Add Another User to assign someone else as a proxy.
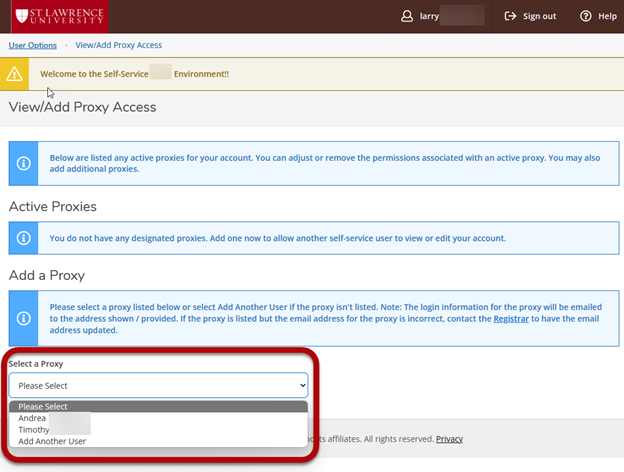
Granting Proxy Access to an Existing Relation
To add an existing relation as a proxy, select the person from the dropdown list.

Once you select the person, perform the following steps:
- Verify the email address is correct. The login credentials for the proxy will be emailed to that address. If it is incorrect, contact the Registrar’s Office to have it updated before proceeding.
- Select the access that you would like to grant to the proxy.
- Read the Disclosure Agreement and check the authorization box.
- Click Save.

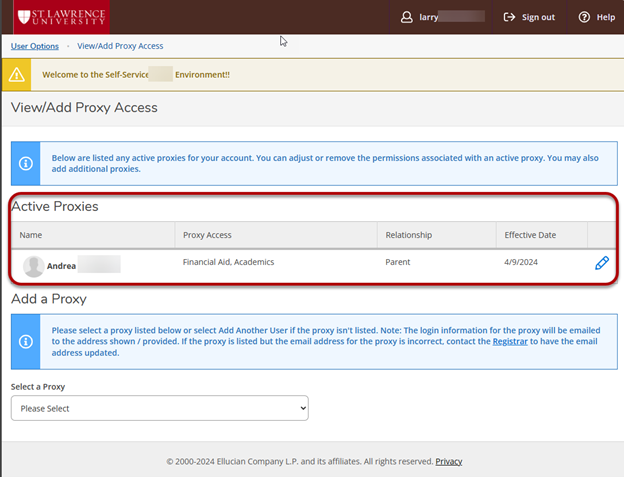
After you click Save, the proxy will be active and will display in the Active Proxies section in Self-Service.
The proxy will receive two emails: the first with the link to Self-Service and their username and a second with their temporary password. You will be copied on the first email.
Granting Proxy Access to a New User
To grant proxy access to someone who is not currently listed in the Select a Proxy dropdown, choose the Add Another User option.
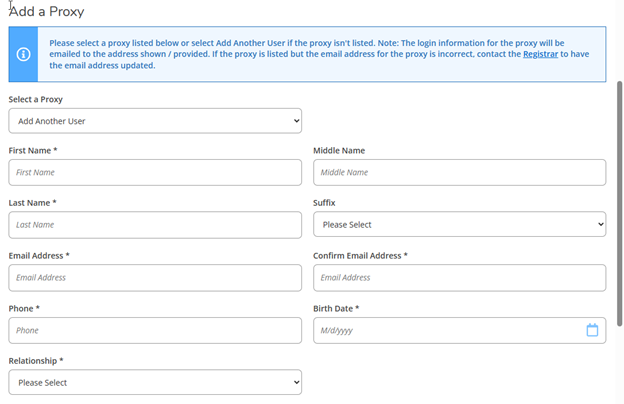
You will be prompted to enter information about the proxy (*required):
- Proxy First Name*
- Proxy Middle Name
- Proxy Last Name*
- Proxy Suffix
- Proxy Email Address* - Credentials will be emailed to this email address
- Proxy Phone Number* - For identification purposes only
- Proxy Birth Date* - For identification purposes only
- Proxy Relationship to You* - Choose “Friend” if none of the others are applicable
Select the appropriate access and authorize it as outlined earlier and click Submit. You will be presented with one of three different confirmation dialog boxes depending on if a match was found, a possible match was found, or no matches were found in the system.
Existing Match Found when Adding New User
If the information entered matches that of an existing user in the system, the following dialog box will be displayed:
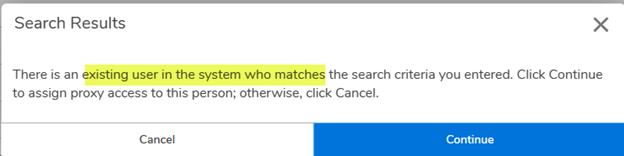
When you click Continue, the existing user in the system will be granted proxy access.
No Match Found when Adding New User
If the information entered does not match the information for any users currently in the system, the following dialog box will be displayed:
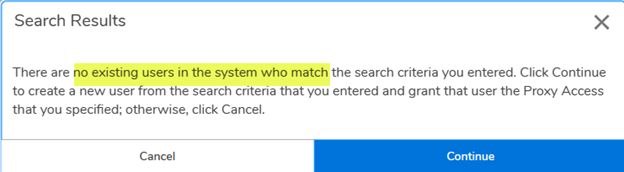
If you think that the proxy you are adding should already be in the system (e.g., they are an alumni, an employee, etc.), click Cancel and contact the Registrar’s office for update.
Possible Match when Adding New User
If a possible match to an existing user in the system was found, the Search Results dialog box will be displayed as shown below:
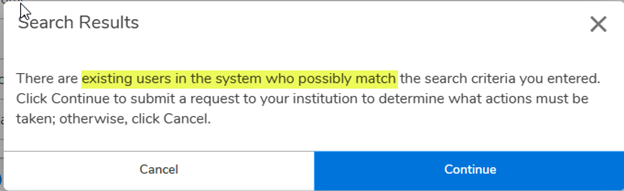
When you click Continue, the proxy information is forwarded to a university office for resolution. The proxy is added to the Active Proxies section in Self-Service with “Pending” in the Effective Date column. The proxy will not have access until the possible match has been resolved.
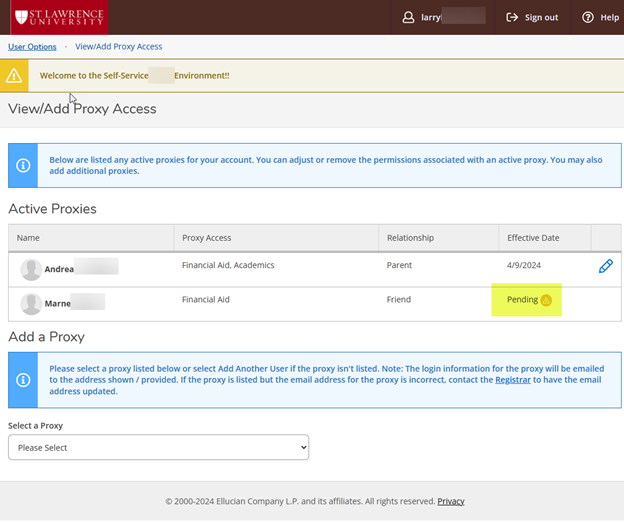
Once the university office has resolved the possible match, “Pending” will be replaced with the Effective Date. The proxy will have access once that is done.
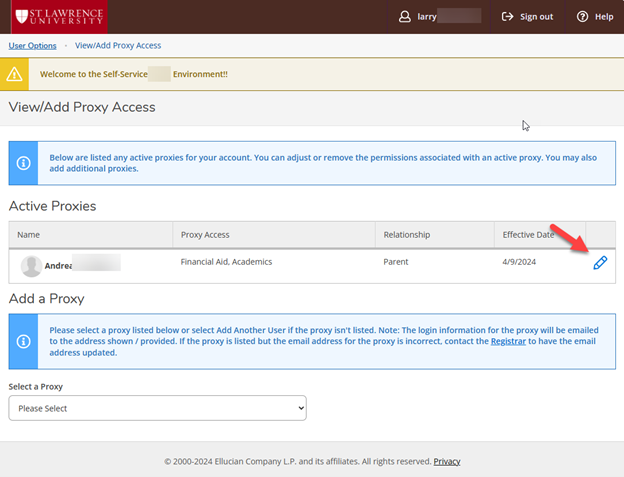
Changing the Access for an Active Proxy
To add, update or remove access for an active proxy, click on the pencil icon to the right of the proxy you want to change.
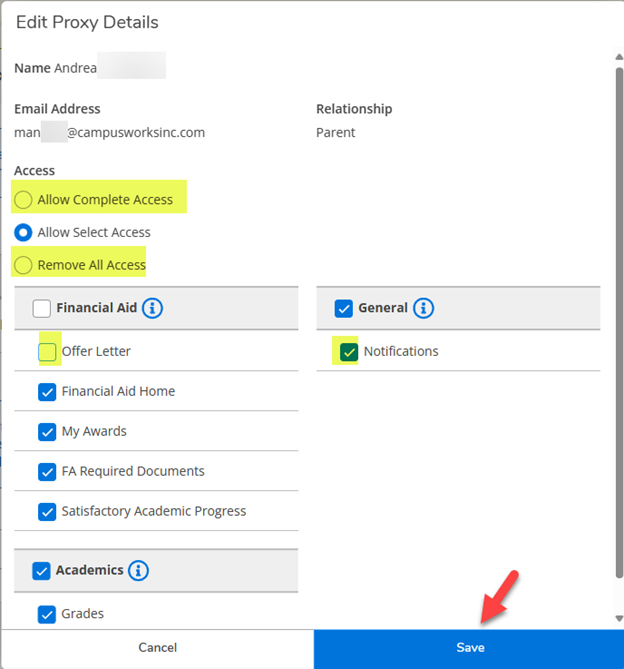
On the Edit Proxy Details dialog box, you can check and/or uncheck specific access or remove all access. Once you are finished, click Save to update the access.
The proxy will be notified that their access has been changed. (It will not provide details on what has been changed, just that it has.)